Welcome to Techdim
Tech-savvy guide through the exciting world of technology at Tech Dimension
We’re here to simplify the complex and make technology understandable for everyone. Whether you’re looking for advice on gadgets, software, or solutions to tech issues, we’ve got your back. Our dedicated team of experts is here to share real-life experiences and provide you with the best and most effective insights. Join us on this journey as we explore the vast dimensions of technology together.
As Featured In
We’re proud to have been featured by some of the world’s leading organizations. These features highlight our excellence in the field of Electronics Knowledge. Here are a few of the organizations that have recognized our work


 Browse Categories
Find Popular topics for your circuit needs:
Recent Blogs
-
Why More People Are Turning to Virgin Media for Their Broadband, TV, and Phone Needs
In the ever-evolving landscape of connectivity and digital infrastructure, performance matters. Whether it’s broadband, television, or landline telephony, the quality of service increasingly defines user…
-
Why Facebook Ads Are Frustrating in 2025
If you’ve dabbled in Facebook Ads or more accurately, Meta Ads you’ve likely experienced the infamous maze of dashboards, account permissions, and lingering tracking Pixels that just won’t go away. Despite Meta’s rebranding and deeper integration of Facebook, Instagram, and WhatsApp, there’s still an elephant in the room: the user experience for advertisers is unnecessarily complex and, in many cases, broken. Let’s unpack what’s going on, why it’s frustrating, and what the future might hold. Quick Summary: Why This Matters Meta’s Advertising Structure: What You’re Dealing With Meta’s business tools aren’t just for Facebook anymore—they span across three major platforms: All of these run through a common backend: On the surface, this looks comprehensive. Under the hood, it’s often inflexible and full of legacy restrictions. The Pixels Problem: Once It’s There, It’s Forever Creating a Pixel is simple—but what if you don’t want it anymore? Well, you can’t delete a Pixel from your Business Manager. You can only disable it or stop sending data to it. The Pixel will still live in your account, creating clutter and confusion for your team. This becomes a real problem when: Why It’s Frustrating: Meta’s Integration of Facebook, Instagram, and WhatsApp: A Work in Progress Meta has technically done a solid job of integrating these platforms from an ad delivery standpoint—a single campaign can run across all three. However, this integration has not extended to infrastructure simplification. Platform Use in Ads Tools Facebook Core platform for most ads Full functionality Instagram Placement within Facebook Ads Fully integrated…
-
The Hidden Cost of Cookies in Real Time Bidding: Privacy on Auction
In the intricate world of digital advertising, Real-Time Bidding (RTB) stands out as a marvel of efficiency and scale. Every time a user loads a webpage, an auction occurs in milliseconds to determine which ad will be displayed. This process, while swift and seamless, has profound implications for user privacy—especially when third-party cookies are involved. The Anatomy of an RTB Auction When a user visits a webpage, the publisher sends an ad request to an Ad Exchange. This request often includes user data, such as browsing history, location, and device information, typically stored in third-party cookies. Demand-Side Platforms (DSPs) receive this data and decide in real-time whether to bid on the ad impression. Advertisers then place their bids, and the highest bidder’s ad is displayed to the user. This rapid exchange of information, while optimizing ad relevance, also means that user data is shared across multiple entities in the ad tech ecosystem, often without explicit user consent. The Role of Third-Party Cookies Third-party cookies are set by domains other than the one the user is visiting. They track users across different websites, enabling advertisers to build detailed profiles for targeted advertising. In the context of RTB, these cookies are instrumental in identifying users and determining which ads to serve. However, the use of third-party cookies raises significant privacy concerns. Users are often unaware of the extent to which their data is being collected and shared. Moreover, the data collected can be sensitive, encompassing health information, financial status, and personal preferences. Regulatory Landscape and Enforcement In the United States, the Federal Trade Commission (FTC) has taken steps to address privacy violations in RTB. For instance, the FTC settled with Mobilewalla, a data broker, for collecting and selling sensitive location data obtained through RTB exchanges without consumer consent. The settlement prohibits Mobilewalla from selling sensitive location data and mandates the deletion of previously collected data . Additionally, the Protecting Americans’ Data from Foreign Adversaries Act (PADFAA) has been invoked to challenge the sharing of sensitive RTB data with foreign entities. A complaint under PADFAA highlighted how Google’s RTB system broadcasts sensitive personal data, including information from U.S. military personnel and national security leaders, making it accessible to foreign adversaries . Google’s Shift on Third-Party Cookies Google’s decision to abandon its plan to phase out third-party cookies in Chrome has been met with criticism from privacy advocates. The initial plan, part of the Privacy Sandbox initiative, aimed to enhance user privacy while maintaining ad targeting capabilities. However, the initiative faced growing criticism and regulatory scrutiny, leading Google to pivot to a user-choice model . This move underscores the challenges in balancing privacy concerns with the advertising industry’s reliance on user data for revenue generation. Privacy First Alternatives In response to growing privacy concerns, several privacy-first alternatives to third-party cookies have emerged: While these alternatives show promise, they are still in the early stages of adoption and face challenges in scalability and industry buy-in. The Road Ahead The intersection of cookies, privacy, and RTB in programmatic advertising presents a complex landscape. As regulatory pressures increase and consumer awareness grows, the industry must evolve to prioritize user privacy without compromising the effectiveness of digital advertising. Advertisers and publishers should consider adopting privacy-first strategies, such as leveraging first-party data, implementing consent management platforms, and exploring alternative identifiers. Collaboration with regulatory bodies and adherence to privacy standards will be crucial in navigating this evolving terrain.
-
Why Your ML Pipeline Is Breaking in Production And How to Fix It
Machine learning prototypes like a dream and deploys like a nightmare If we ask any team that’s scaled an ML project beyond a notebook, and they’ll tell you: getting a model to work is the easy part. Keeping it working—correctly, reliably, and ethically—in production? That’s where the real battle begins. Let’s talk about the cracks that appear when ML hits the real world, and what seasoned teams do to patch them before they widen. The Most Common Failure Points in Production ML 1. Data Drift: Your Model Is Learning from Yesterday’s World You trained your model on data from Q2. It’s now Q4, and user behavior has shifted, supply chains have rerouted, or the fraud patterns have evolved. Meanwhile, your model is confidently making predictions based on a world that no longer exists. How to Fix It: 2. Silent Failures: No One Knows It’s Broken Until It’s Too Late Your model outputs are being used downstream in production systems. The problem? It’s spitting out garbage—but it’s well-formatted, looks fine, and no one’s checking. How to Fix It: 3. Feature Leakage & Inconsistency: Your Training and Production Logic Don’t Match In training, you cleaned, transformed, and imputed data in a controlled environment. In production, the feature pipeline was reimplemented (or worse, manually replicated), and now your model is operating on a different reality. How to Fix It: 4. Retraining Without a Strategy: You’re Flying Blind You retrain your model weekly. Cool. Why? Is it helping? Are you tracking whether performance is improving—or quietly regressing? How to Fix It: 5. Lack of Observability: You’re Operating Without a Dashboard No logs. No metrics. No dashboards. If something goes wrong, it’s a post-mortem and a prayer. Without visibility, you’re not in control—you’re guessing. How to Fix It:…
-
Taming the Windows Registry: A No-Nonsense Guide for Brave Tweakers
Look, if you’ve found yourself poking around in the Windows Registry, you’re either very curious, very brave, or very lost. Possibly all three. But welcome – you’ve come to the right corner of the internet.
-
How to Optimize Your Mouse for Competitive FPS Gaming in 2025
Forget RGB lighting and slick marketing. If you want to compete in ranked matches without blaming lag for every lost duel, your mouse setup needs…
-
Is Your Broadband Actually Delivering? Here’s What You Need to Know Before You Switch
If you’ve ever stared at a frozen Zoom call, waited way too long for a file to upload, or watched your Netflix buffer like it’s…
-
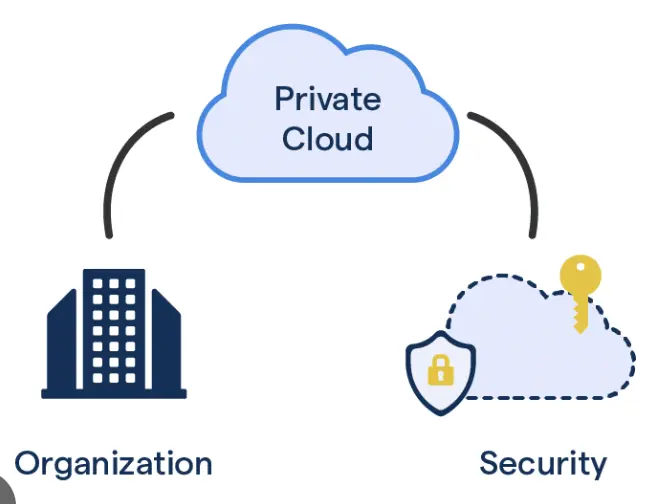
Why the Private Cloud Is Still the Quiet Backbone of Serious Tech
Let’s cut the marketing fluff. While everyone’s yelling about public cloud, serverless, and whatever as-a-service just dropped on Twitter, the private cloud is over here…
-
Getting Started with WiFi Modules: A Practical Guide for Embedded Developers
So, you’re building something that talks to the internet. Maybe it’s a temperature logger, maybe it’s a robot that tweets, maybe it’s just you procrastinating…


Hardware & Software
- How to Optimize Your Mouse for Competitive FPS Gaming in 2025
- Getting Started with WiFi Modules: A Practical Guide for Embedded Developers
- How to Run iOS Apps on Windows
- Scroll Wars: Why Your Next Mouse Might Be Smarter Than You
- Adobe Isn’t Just a Tool Anymore — It’s a Walled Garden, and Power Users Feel It
- How to Build a Mechanical Keyboard That Doesn’t Suck (and Actually Matches Your Setup)
- The Future of Antivirus Software: Will It Be Replaced by AI?
- Overclocking and Power Consumption: How Far Can You Push Your System Before It Burns Out?
- Decoding Your Router Lights: A Comprehensive Guide to Understanding Status Indicators
- NVIDIA vs. AMD: Which Graphics Card Should You Choose for Your Next Build?
Technology
- Why the Private Cloud Is Still the Quiet Backbone of Serious Tech
- Exploring the Role of Digital Twins in Modern Technology
- The Command-Line Interface (CLI): Still Relevant in the Age of GUIs
- Understanding the MEAN Stack: A Deep Dive into JavaScript-Based Web Development
- Create a Website in Minutes with Shopify
- SentryPC: The Ultimate Employee Monitoring and Productivity Tracking Solution
- TELESIN Unveils Comprehensive Accessory Lineup for GoPro Hero 13, iPhone 16, and DJI Action 5 Pro
- Felo AI Technology Supports the Protection and Development of World Intangible Cultural Heritage
- How Face Swap Technology is Changing the Entertainment Industry?
- Is Fortnite a CPU or GPU Game?
Android & Windows
- Taming the Windows Registry: A No-Nonsense Guide for Brave Tweakers
- How to Run iOS Apps on Windows
- Harnessing Virtual Desktops for Workflow Organization: Mastering Productivity in Windows 11
- How to Fix Slow Startup on Windows 10 [100% Working]
- How to Fix the Blue Screen of Death (BSOD) in Windows 10
- What Is Carrier Hub Processing Requests?
- How to Check Your Smartphone’s Memory Usage?
- Precision in Every Line: Real-Time Operating Systems (RTOS) in Embedded Software
- What Is Dex2oat Android? A complete walkthrough
- How Cluttered Software Affects Your Phone’s Performance?
Artificial Intelligence
- Why Your ML Pipeline Is Breaking in Production And How to Fix It
- The Future of Antivirus Software: Will It Be Replaced by AI?
- Exploring AI-powered Glasses for Visual Impairment
- Content Writing Services: The Key to Your Firm’s Long-Term Accomplishments
- How Much Can a Trading Bot Make?
- Tech Trends: Top 5 Emerging Technologies for Business
- The Impact of Undetectable AI Writers on the Job Market
- Navigating Creativity: A Guide To Writing With ChatGPT
- Google Gemini AI: What is it, and How to Use and It’s Comparison with ChatGPT?
- Does ChatGPT Have Malware? What I Found
Can’t Find What You’re Looking For?
Need Assistance?
Tech Solutions


Techdim works on –

Simplifying Technology
We simplify technology so everyone can understand it. No jargon or confusion.

Tech Trends
Stay updated on the latest tech trends, gadgets, and DIY projects with our insights and recommendations
Problem-solving
We help you solve your tech issues. From software troubles to choosing the right gadgets, we’ve got solutions
Techdim Numbers
Monthly readers
Tech Guides
Years Online
How Techdim Ensure Quality Content?
At Techdim, a bunch of young tech enthusiasts invest countless hours in researching, experimenting, and fine-tuning every article. Their dedication ensures that you receive accurate, up-to-date, and reliable information.

Expert Opinions
We start with insights from our tech enthusiasts

Thorough Research
In-depth research from credible sources informs our content

Editors’ Review
Experienced editors ensure clarity and readability

Publishing
Only after passing these stages do articles earn their place on our site