How to Flash BIOS with USB | Create a Portable BIOS Tool
Although BIOS update doesn’t usually boost performance, it is still recommended to fix any hardware-related bugs. Also, it adds support for newer devices. But updating it can be a bit of a hassle since most of us don’t know where to start.
So, in this article, we’ll explain how to flash BIOS with USB, which is one of the easiest and most recommended methods to flash or update BIOS.
You need to download your BIOS update, copy it on a USB stick and restart the computer to BIOS, then proceed with updating from there. Continue reading for a more detailed guide.

How to Flash BIOS With USB
There are several methods to flash BIOS with USB drives or thumb drives. The methods are given below:

Method 1: With a Standard USB Drive
Step 1: First, you have to insert a blank USB drive into your computer.
Step 2: Then, you have to download the updated version which you want for the BIOS. You will get the download link from the manufacturer’s website.
Step 3: Next, you have to copy the update file for your BIOS on the USB flash drive. You have to also make a note of the mane and extension of the update file at the same time. You have to note the exact of the file. And doing these things, you have to connect the USB drive with your computer.
Step 4: Now, you have to restart your computer. You have the press the key which is required and enter the BIOS. Usually, the required key is F2 or any function key. When your computer powers on, you have to press the key immediately.
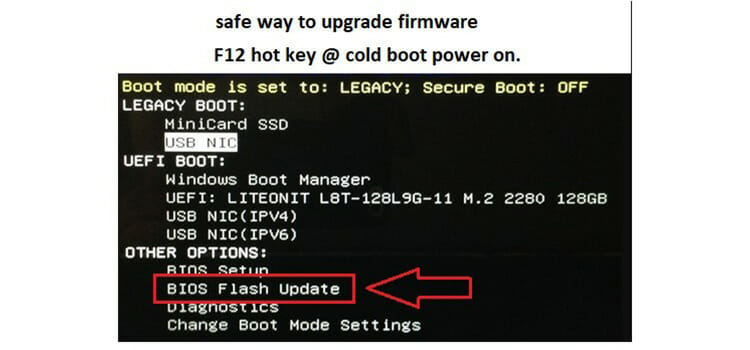
Step 5: You have to enter the boot menu. Once you are there, you have to change the hardware. You will find this under the Primary Boot Devices to the attached USB flash drive. You have to select Save changes and exit to restart the computer.
Step 6: A command prompt will appear on the computer screen. When it will appear, you have to type in the BIOS update file name on the USB drive and have to press Enter.
Step 7: Now, you have to press the Y key to confirm the update. You have to put the USB drive in the computer during this process.
Step 8: Finally, when the BIOS flash process will be finished, you can remove the USB drive from the computer.
Method 2: Flash AMI UEFI BIOS by USB Disk
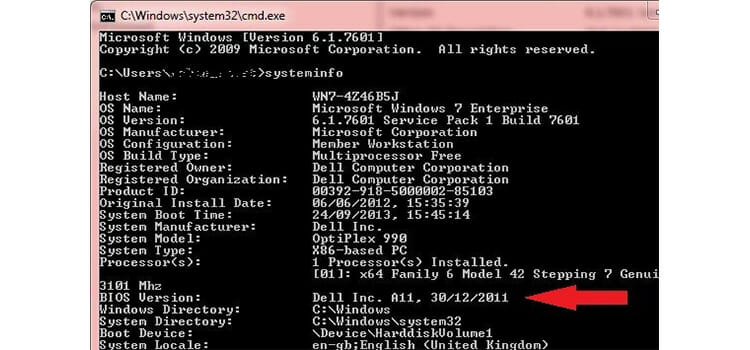
Step 1: First, you have to know the model number. For this, you have to open the case and find the MS-XXXX and the version number on the motherboard.
Step 2: Then, you have to boot up the system and press the Delete key for entering the BIOS screen.

Image courtesy: AMI
Step 3: Next, you have to download BIOS which matches the motherboard and also the version of the USB drive.
Step 4: You have to extract the downloaded BIOS-zip file. Then, you have to paste the file into the USB storage device.
Step 5: Now, you have to boot the system from a USB storage device.
Step 6: A DOS prompt will appear, Then you have to execute the following:
C:\7752V22>afude238 e7752ins.228
Step 7: Now, you have to reboot the system.
Step 8: Finally, the flash will be done and C: prompt appear on your screen.
Method 3: Flash BIOS For Acer Aspire
Step 1: First, you have to format the USB memory key with FAT mode.
Step 2: Then, you have to download the latest version for the BIOS from the website Acer support website.
Step 3: Next, you have to enter the model number of the BIOS and get the correct version for your Acer laptop.
Step 4: Now, you have to extract the files from the zip and have to put the FLASHIT.EXE and BIOS file in the root directory of the memory key.
Step 5: You have to rename the BIOS file to ZG5IA32.FD.
Step 6: After that, you have to remove the disk.
Step 7: In this stage, you have to turn off the laptop and insert the battery and also connect the AC adaptor.
Step 8: You have to insert the USB memory into any USB port of the laptop.

Step 9: Now, you have to press Fn+Esc. You have to press the keys and press the power button at the same time.
Step 10: When the power button starts blinking, you have to release the Fn+Esc kyes.
Step 11: Finally, you have to press the power button once. Your laptop will automatically start the BIOS flash. After a few minutes, the laptop will stop blinking and it will reboot. You have to wait until the operations are completed.
Method 4: Flash BIOS with USB for an ASUS Motherboard
Step 1: First, you have to boot to BIOS. You have to navigate to Tool and then EZ Flash.
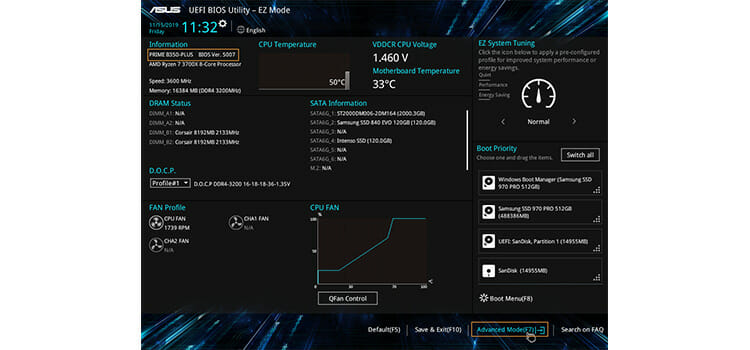
Step 2: Then, you have to check the current BIOS version. You can make a note of it.
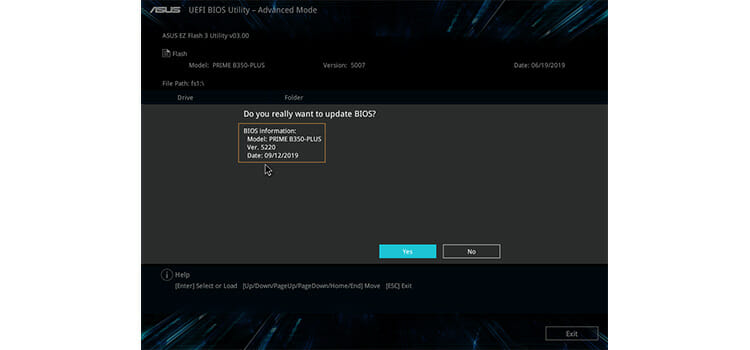
Step 3: You have to download the latest BIOS iteration from the ASUS website. You have to store the downloaded file on a USB device.
Step 4: Now, you have to select the USB device. From the USB, you have to select the file and press Enter.
Step 5: Before applying the update, it will prompt for one final time. You have to review it and accept it.
Step 6: You have to reboot upon completion.
Step 7: You have to check the BIOS version again and ensure the update that was applied.
Step 8: Finally, you have to re-apply the BIOS setting manually.
Frequently Asked Questions and Answers
Are BIOS updates necessary?
Yes, BIOS updates are necessary but not mandatory. To make your system work better all around, plus for security purposes, you should update your BIOS from time to time.
Can I flash BIOS without CMOS battery?
Yes, you can flash BIOS without the CMOS battery. BIOS is not reliant on the CMOS battery in any way. The only issue you will run into is that your system won’t remember your BIOS settings and the time and date will be inaccurate sometimes.
Conclusion
Newer firmware (BIOS) will enable your computer to recognize newer hardware, especially if you’ve updated something recently and your computer cannot recognize it, a BIOS flash can be the answer. Also, newer firmware has security loopholes patched, that’s another reason to update. We hope we were able to help you understand how to flash BIOS from USB. Thanks for reading.
Subscribe to our newsletter
& plug into
the world of technology


hello
I have an Acer Aspire E1 532 LA 9532P V5WE2 Rev 1A and any bios file I have ever downloaded for it was in bin format and the file doesnt have flashit.exe and any file with .fd format what should i do??
thnaks for your attention
Did you have downloaded it from the Acer website? If not then could you please download the BIOS file from there? Though you can use the BIN file to update the BIOS. For more information, you can check a few videos on YouTube. if you are having issue then let us know in the reply of this comment. Thank you!