How to Remove BIOS Password in Windows 10
Forget password is a problem that we have all experienced at some point. While most of the time, merely clicking on the Forgot Password option and completing a few simple steps will provide you access back, that isn’t always the case in some situations. If you forget your BIOS password that is normally used to prevent entrance into the BIOS settings or to prevent your computer system from booting, you will not be able to boot your system at all. You can remove bios password to solve this issue. If you want to know how to enter into BIOS, check this article.
You can set a BIOS password to prevent others to get access there as BIOS is one of the most important things for a computer. But after providing a password if you somehow forget the password then you will have a hard time getting access in BIOS.
Are you currently going through this situation and looking for ways that you can follow to remove the BIOS password? Then this article can help you out and by following this you will be able to remove the BIOS password. So, let’s explore the ways.
How to Remove BIOS Password Windows 10
Method 1: Use Backdoor Password to remove BIOS
This strategy works on the majority of modern PCs. Every BIOS has a backdoor password. Just you will need to provide the code and get the backward door password. On a Fujitsu-Siemens Phoenix laptop, we tested this procedure, and it worked wonderfully.
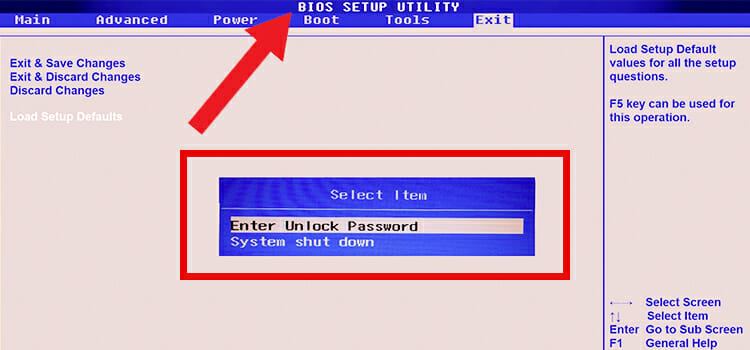
Step 1: First, you have to start your computer and enter the BIOS password several times until you get System Disabled message on your monitor. Basically, after 3rd attempt, you will get it.
Step 2: Now, a number or code will appear on your computer screen. That code should be written down on a little paper or your phone.

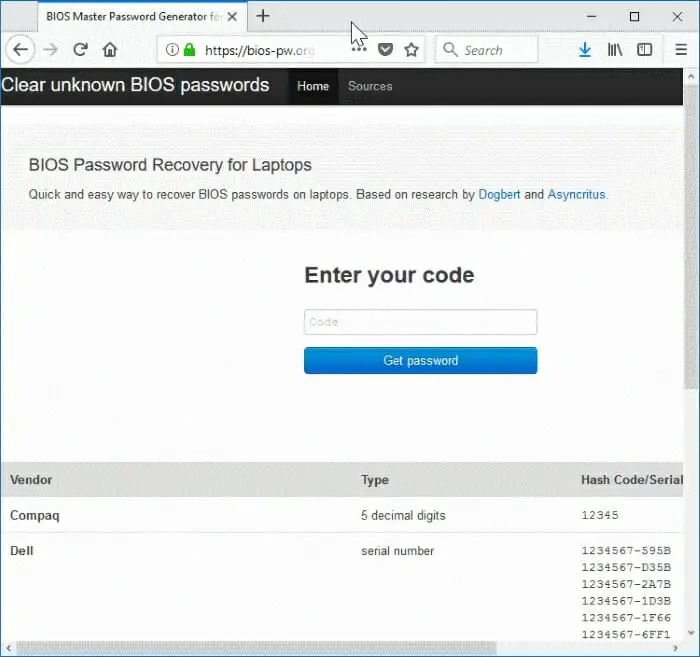
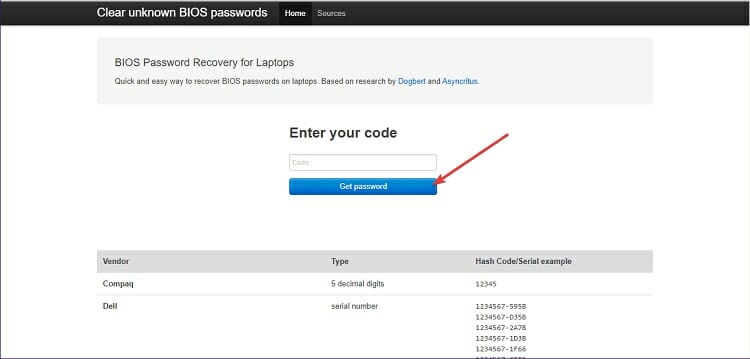
Step 3: Now, go through this website, Clear Unknown BIOS Passwords. Provide the code you have on the BIOS window and click on the Get password option to reveal the password.
Step 4: Finally, on your computer, type in the password you just created. If you are unable to do so, restart your computer and then type in the password that you received in the 3rd step to gain access to your computer.
That is all there is to it. Your PC and the BIOS should both be accessible at this point.

If you have attempted to crack your BIOS password and have been unsuccessful, you may be able to reset the password, according to the manufacturer.
Method 2: Remove CMOS Battery
CMOS battery are directly related with BIOS. When you remove or replace a CMOS battery, it resets BIOS settings. So, for removing password, this method can be of help! Here are the steps.
Step 1: Turn off your PC and open up your PC case or laptop’s back part.
Step 2: Now, look for CMOS battery. It looks like a watch battery.
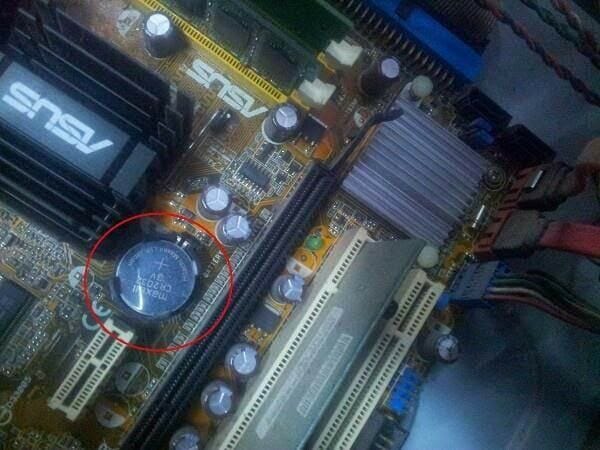
Step 3: Once you have found it, remove the battery and wait for 30 seconds to 10 minutes. Now, again place it and turn on your computer.
By now, you will be able to remove BIOS password.
Method 3: Reset Jumper
Some motherboards come with fixed CMOS battery and if yours one is one of them then you will need to reset Jumper on your motherboard. Resetting the jumper will reset the BIOS and the password will be removed. Here are the steps –
Step 1: Open up your PC and look for a blue switch around the CMOS battery.
Step 2: The Jumper has two positions, 1-2, and 2-3. 1-2 is the initial position of it. Move it to 2-3 position.
Step 3: Now, wait for 1 to 5 minutes and then reposition the jumper in 1-2. After this, your BIOS password will reset.
Method 4: Execute the Command from the MS-DOS Prompt
This procedure is only effective if you have access to the operating system that has been installed. Once you have logged into your desktop, you must open the MS-Dos software and then execute the commands listed below in the same order as they are seen in the picture below:
debug, o 70 2E, o 71 FF, quit
Step 1: You must first boot into MS-DOS mode on your computer. For this, restart your PC. Then, you have to open the Boot menu. Once, you are there, you have to select Safe Mode via Command Prompt.
Step 2: When you are in the MS-DOS mode, you will see a black cmd dialogue box will appear with a C: WINDOWS> prompt. There, you have to type Debug and then press Enter.
Step 3: Then press the Enter key to execute each of the command listed below:
- debug
- o70 2E
- o71 FF
- quit
Step 4: Now, you have to type Exit there and press Enter.
Step 5: Finally, you have to restart your computer.
When you attempt to access the BIOS settings the next time, you will not be prompted for a password.
Removes all BIOS configurations, including the BIOS password, and then restarts your computer when they have been removed. This is accomplished via the Debug tool included with Microsoft’s Windows operating system.
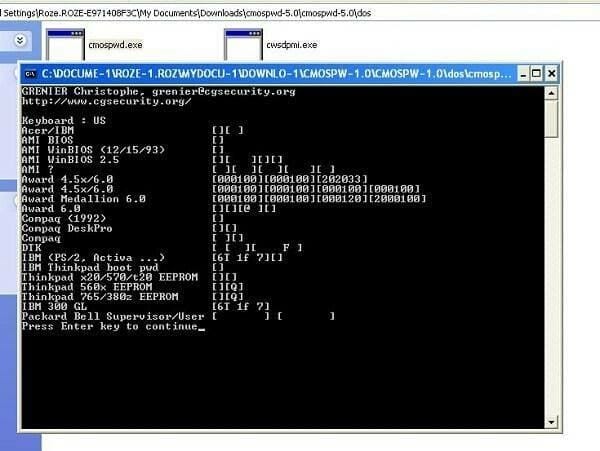
Method 5: Use Third-Party Software
The availability of third-party software to reset BIOS passwords has increased significantly in recent years, but access to the software is still required. CmosPwd and Kiosk, two well-known BIOS password cracking programs.
While it will not provide you with the same password, the ones that are produced will be similar enough that you might nearly recall the correct one.
While it will not provide you with the same password, the ones that are produced will be similar enough that you might nearly recall the correct one.
Bonus Tips: If you are looking for ways to disable BIOS passwords then follow this sequence to do so. Restart your computer > Navigate to BIOS > Security Tab. There you will get the Password to disable option.
Conclusion
So, here it is. Follow the aforementioned methods and get rid of the BIOS password. If you are willing to have an easy method then it is suggested to use method 1. And if all the methods failed then you will need to get in touch with your laptop/PC motherboard manufacturer. That’s all for now, for any further queries, let us know in the comment box.
Subscribe to our newsletter
& plug into
the world of technology


![[Fix] Unfortunately Pokemon Go Has Stopped (100% Working)](https://www.techdim.com/wp-content/uploads/2022/04/How-to-Fix-Unfortunately-Pokemon-Go-Has-Stopped-Issue.jpg)