How to Enable Hardware Acceleration | Easy Steps to Enable
Hardware acceleration is a very common and most-used word in the software and hardware field. If you have powerful computers, then this option is for you. Again, if you have powerful and stable GPU hardware then this is for you. Because hardware acceleration in some powerful applications, devices, or hardware can make smooth performances. For this reason, you should know the process of how to enable hardware acceleration.
Hardware acceleration is like a stair that can make a smooth connection between the flexibility of the CPU and the efficiency of the GPU. So it works as a smooth maker for your device. It can increase the productivity of your device.
In this article, you will learn the whole process of enabling hardware acceleration in Windows, Chrome, Opera, and Microsoft Office.
How to Enable Hardware Acceleration
Here you will get all the steps of enabling hardware acceleration in Windows 10/8/7, Chrome, Opera, and Microsoft Office. So let us start the journey. All the best for your journey.
How to Enable Hardware Acceleration on Windows 10
First, you have to know all the computers do not have access to enabling and disabling the hardware acceleration option. Most computers that use NVIDIA AMD or AMT graphics are not capable of using these features. Rather the older computers and onboard video use this feature for having smooth performance.
However hardware acceleration can not speed up or down the performance of your computer. But it can smooth the performance of your computer and make effective usage of many applications of your computer.
So you should know the process of enabling the hardware acceleration process. Here you will get the process thoroughly. Click here if you want to learn about the screen overlay issue.
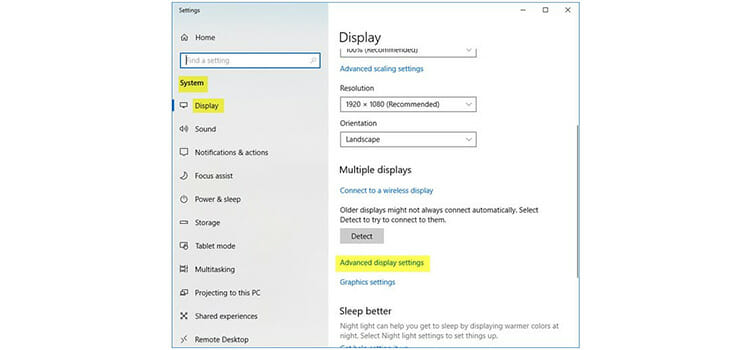
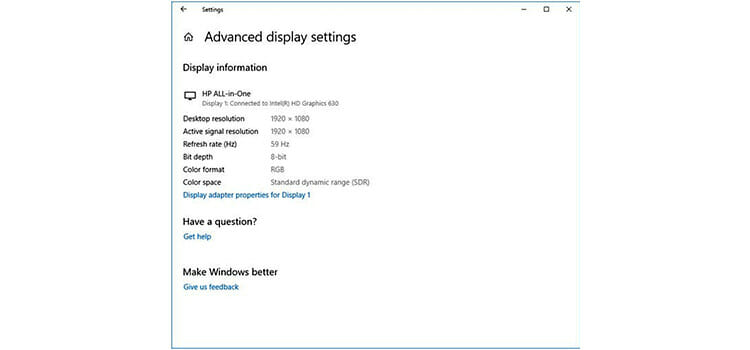
At first, you have to type Settings on the start menu search box and enter into settings. Then, you have to choose the System and click on it. There you will get the Display option on the left pane. You have to select and click on it. After scrolling down the left pane of the display, you will get Advanced display settings. So you have to choose this.
Now you have to click on Display adapter properties for Display 1.
Now you will get the Graphics Properties box and here you will get the Troubleshoot tab. One thing, sometimes after clicking the display adapter properties for the Display 1 option, you may not get the troubleshooting tab on your graphics driver. This is because your computer does not allow the change of the hardware acceleration feature. In this case, you can update your graphics driver, and then you will get the option. So you have to go soft there. But if you get the troubleshot tab, then you go further.
Sometimes after getting the troubleshooting tab, the changing option called display settings will be greyed out. In this case, you will not be able to change the settings. For this, you have to solve the greyed out problem. By updating your driver, you can solve this problem.
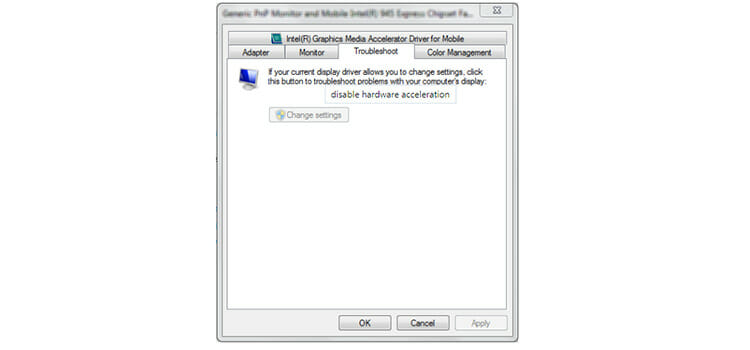
If your driver allows you to change the settings, then you have to click the Change Settings option.
This time you will get the Display Adapter Troubleshooter display. You have to move the pointer extreme right to enable hardware acceleration.
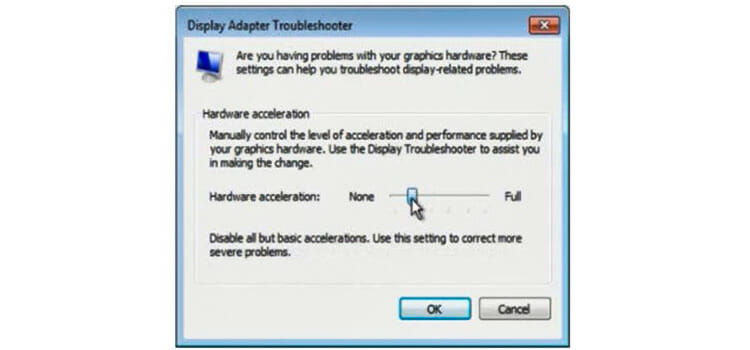
You have to click the OK button. That’s the process of enabling hardware acceleration in Windows 10.
How to Enable Hardware Acceleration on Windows 7/8
If you have Windows 7 or 8 on your laptop, then you have to follow the following steps to enable hardware acceleration.
At first, you have to click on the desktop and you will get a context menu. From the context menu, you will get the Personalization option and you have to click on it.
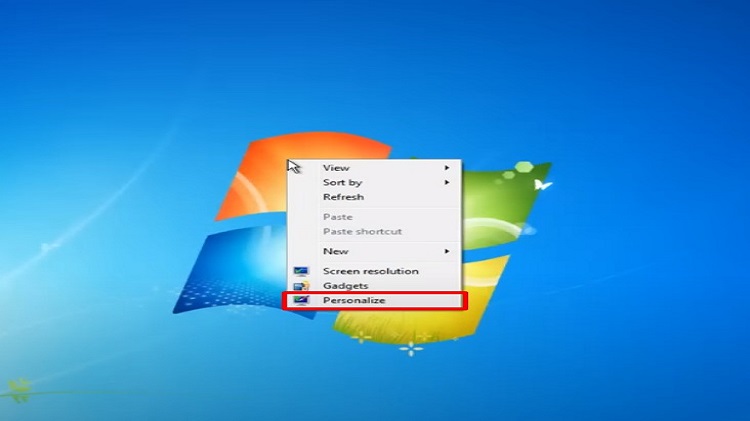
Now, you will get the Display option and you have to select the Change Display settings option from the left pane.
Now you have to select Advanced settings after scrolling a bit down.
Now you have to open the Graphics Properties Box and later you have to follow that instruction which comes to Windows 10 at the troubleshoot tab.
How to Enable Hardware Acceleration in Chrome
To have good browsing access in Chrome, if you have powerful and stable GPU hardware in your computer or laptop, it is best to enable hardware acceleration in your Chrome browser. For this, you have to follow the following steps which are very easy to do.
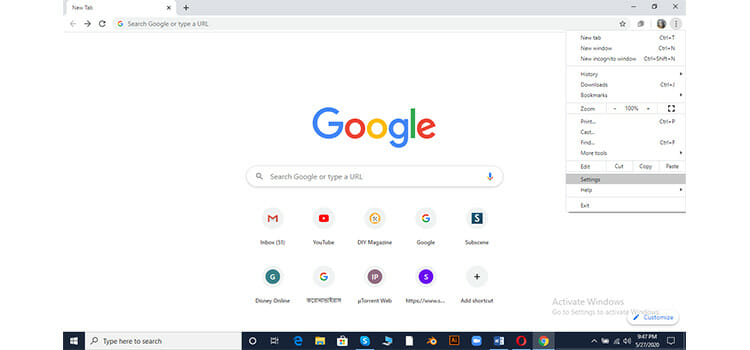
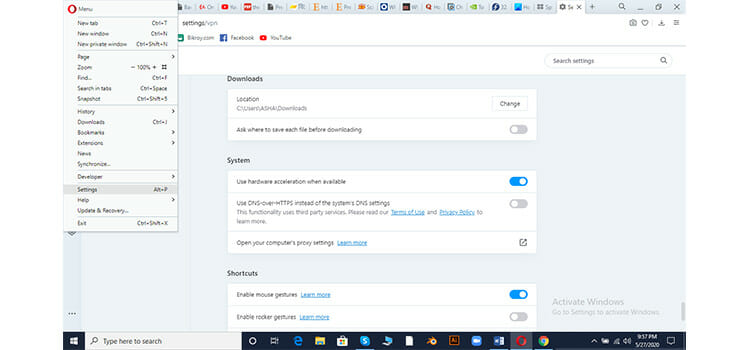
At first, you have to open your Chrome browser and have to click on the three-dot button at the very right. There you will get the Settings option below. You have to click on it.
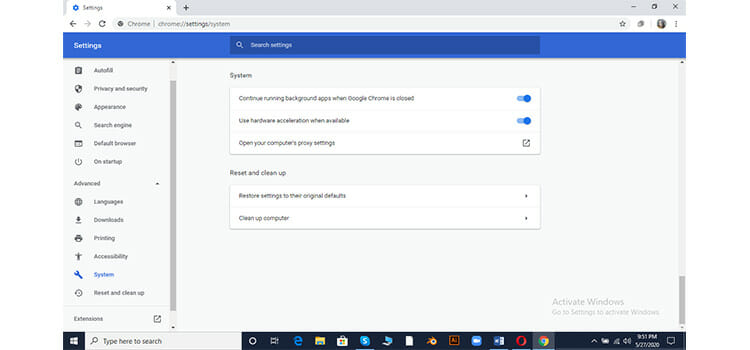
Then, you will get the Advanced option on the left pane. You have to click on it. There you will get the System option and again you have to click on it. Then, at the right, you will get the Use hardware acceleration when available option. You can launch that option by clicking on the option.
Thus you can enable the hardware acceleration on your Chrome browser.
How to Enable Hardware Acceleration on Opera Browser
Like Chrome, you have to do all the same things. Actually, for all the web browsers you can follow the following steps. You have to open your browser and click on their icon or log and there you will get the settings option.
You have to click on it and there you will get the Advanced option. Under that option, you will get the features option. After scrolling a bit, at the bottom, you will get System sub-option. There you will get the Use hardware acceleration when available to enable.
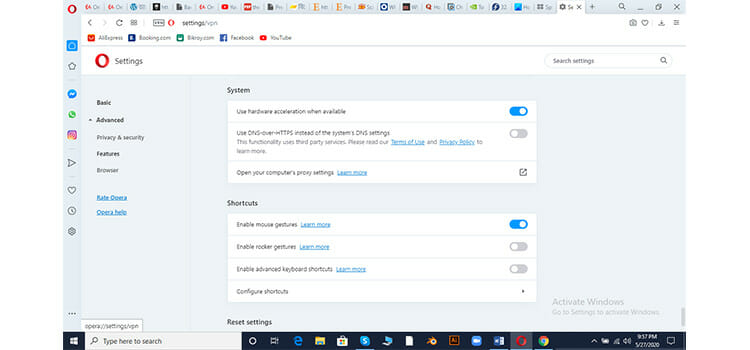
Thus, your enabling process is completed.
How to Enable Hardware Acceleration on Microsoft Office
If you are using Windows on your laptop, then there is a Microsoft Office as a built-in app. Here you get the option of enabling hardware acceleration option. To get this option, you have to go through the following steps.
At first, you have to open the office app and open it. After opening it, you will get the File menu at the very left. You have to click on it. Then you will go to a new window and there you will get the Options option. You have to click on it.
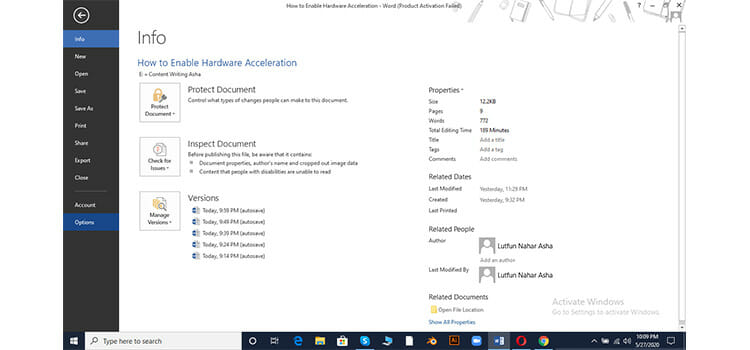
Then you have to choose the Advanced option at the left pane. There you have to scroll a bit down in the right pane and you will get Disable Hardware graphic acceleration. You have to keep it unchecked and click on the OK button.

After this, you have to restart your computer so that this change can work properly.
Conclusion
So here you have got all the processes regarding enabling hardware acceleration. By reading through this article you are going to know about the path of enabling hardware acceleration in different windows, apps, and browsers. We are hoping you have enjoyed it and got benefit from this article.
If your laptop or PC is not old enough you may not get this option in your window because NVIDIA or AMD doesn’t allow the variation in hardware acceleration. But if your PC is older enough and more powerful, you can get a chance to use hardware acceleration. But before doing this we suggest you run a stress test of your computer’s components such as GPU, CPU, etc. So let’s give it a try. Break a leg!
Subscribe to our newsletter
& plug into
the world of technology